Before you are about to have your first violin lesson, there are some essential preparations and knowledge that you need to know and consider in advance, which will help you learn violin next.
Choosing the right violin
Choosing the right violin is crucial for beginners because it will directly affect your learning experience. Here are more specific suggestions on how to choose the right violin:
Price:
Budget is a crucial factor when choosing a violin, especially for beginners. There is no need to spend much money on Higher-end violins, especially if you are a growing student or child. For beginners, low- to mid-priced violins are usually more appropriate and adequate for learning essential skills.
Violin Size:
Violins come in various sizes for students of different ages and sizes. Students age 11 and up will use a standard-size violin, and there are different violin sizes available for children. It is essential to determine the correct size.
To determine the correct size violin for your student, take the following
Measurements:
Fully extend the student’s left arm and measure from the base of the neck to the centre of the wrist or palm.
Most adults and some older children fit a full-size violin (4/4). This depends on the length of your arm and how comfortably you hold the violin. When picking up the violin, it should not feel overly heavy and be able to effortlessly grip the top of the fingerboard and maintain the bend at the elbow. Some adults may feel more comfortable on a 7/8 size violin, and the choice of size should be based on personal feelings.
Purchase essential accessories
When you are ready to start learning the violin, it is essential to purchase some essential accessories. Here are some of the violin accessories you need to consider purchasing:
Rosin:
Rosin is a resin-like substance usually applied to a violin bow’s horsehair. It is what increases the friction between the bow and the strings to produce sound. Without enough rosin, your bow may not make a sound. You can choose rosin with moderate hardness.
shoulder rest:
The shoulder rest is an essential accessory in violin playing. It is located on the lower part of the violin and supports it for more comfortable playing. The shoulder rest helps you to maintain the correct posture while playing and reduces the strain on your neck and shoulders.
Violin Case:
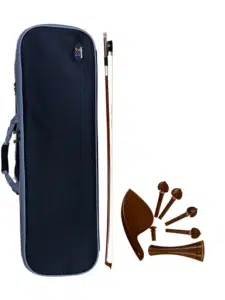
A violin case is used to store and protect your violin. It ensures that the violin is not damaged and makes it easy for you to carry it. A beginner’s violin will come with a violin case. Still, you may consider upgrading to a sturdier and more protective case.
Cleaning supplies:
Keeping your violin clean is very important. You can purchase specialized violin cleaning supplies such as dust balls, wipes, and string cleaners.
Tuning:
A tuner is a valuable tool that helps you in tuning your violin. It can help you ensure that the strings are pitched accurately, especially if you are not entirely familiar with how to tune.
Finding the right teacher
Finding the right violin teacher is significant. Here are some specific suggestions on how to choose the right teacher:
Qualifications:
The teacher’s teaching style should suit you. Some teachers may focus more on the technical details of playing, while others may focus more on musical expression. Have a face-to-face trial lesson with the teacher.
Teaching style:
Ask the teacher if they have any previous or current students who can provide feedback on their lessons. Find out how effective they are and what students think of the teacher.
Student feedback:
Ask the teacher if they have any previous or current students who can provide feedback on their lessons. Find out how effective they are and what students think of the teacher.
Methodology:
Find out if the teacher’s methodology includes a combination of music theory, music fundamentals, and playing techniques.
Understanding basic violin construction:
Before you decide to start learning the violin, it is important to know the parts of the violin that will help you better understand how the violin makes sound:
Strings:
The violin has four strings: G, D, A, and E-strings. Each string has a different pitch. Notes of different pitches can be played by pulling the strings with the bow or by pressing the strings with your fingers.
Body:
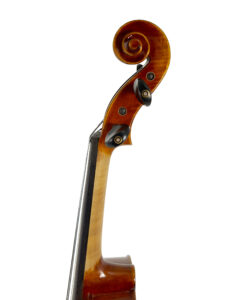
The body of a violin usually consists of two parts connected by F-shaped sound holes. These holes vibrate the air inside the case to produce sound. The size and shape of the F-holes in the body affect the tonal qualities of the violin.
Fingerboard:
The violin bow consists of the shaft, the horsehair, and the handle. The horsehair, usually made of horse hair, is applied with resin (rosin) to increase friction with the strings and produce sound.
Bow:
The fingerboard is on top of the violin, with the strings extending over it. Fingers are pressed against the fingerboard to change the length of the strings when playing.
Learning the names of the strings
The violin has four strings, each with its name and pitch. Here are the details of these strings:
- G String: This is the lowest-pitch string at the violin’s bottom. It produces one of the lowest notes, often called the “low G”. 2.
- D String: The D string is located above the G string, and its pitch is one degree higher than the G string. It is the second string on the violin. 3.
- A String: The A string is located above the D string and is one degree higher than the D string. It is the third string on the violin.
- E-Strings: The E-string is the highest-pitched string and is located at the top of the violin. It produces the highest sound and is often called the “high E”.
How to hold the bow correctly?
There are specific steps you need to take to hold your bow correctly:
- Holding the bow: Hold the handle with your unaccustomed hand (usually your left hand) as if it were the handle of a cup. Your thumb should be underneath the handle, while the other four fingers should be gently wrapped around the top of the handle.
The palm of your customary hand rests on the top of the bow shaft, where the bow hairs are located. The thumb should be gently pressed on top of the bow hair while the other fingers wrap around the shaft. This hand feels a bit like holding a pen.
- Relaxed Fingers: The fingers are relaxed and do not squeeze the bow’s handle. It will be easier to play and more balanced. 3.
- Wrist position: The wrist is relaxed, not bent or stiff. The wrist should be in a straight line with the bow so that it can move freely while playing.
Correct Playing Posture
Standing position:
Feet parallel: Stand in a comfortable feet-parallel position, shoulder-width apart. Keep your body stable and balanced.
Center of Gravity Distribution: Distribute your centre of gravity evenly on both feet without leaning too much to one side.
Legs: Bend your knees slightly, don’t make them too bent. This will help you stay stable while being able to move freely.
Upper Body Posture:
Body posture: maintain a straight body posture and do not hunch over. The shoulders should remain relaxed and not be too tense or elevated.
Head: Lift your head naturally and focus on the music score or the conductor’s position.
Neck and chin: Place the neck of the violin gently on your neck and then gently rest your chin on the chin rest.
How to take care of your violin?
Proper care is important for its tonal qualities and longevity. Here are more detailed instructions on how to care for your violin:
Temperature and humidity control:
The violin is very sensitive to temperature and humidity. Be sure it is kept in the proper conditions:
Temperature: Avoid exposing your violin to extreme temperatures, especially by placing it in hot or cold places, such as in direct sunlight or near heating and cooling. A suitable temperature range is approximately between 15°C and 25°C.
Humidity: It is essential to maintain a moderate level of humidity. The violin should be placed in an environment with a relative humidity of approximately 40% to 60%. If the humidity is too low, consider using humidifiers to maintain the humidity. Too much humidity may cause the wood to swell and become damaged.
CLEANING AND CARE:
Regular cleaning of your violin is key to maintaining its appearance and tonal qualities.
- Use a clean, soft cotton cloth to gently wipe the surface of your violin to remove dust and dirt. Avoid chemical cleaners or overly wet clothes.
- Check your violin’s strings regularly for wear or looseness. If you find any problems, replace or adjust the strings promptly.
- Take care to keep your violin’s bow and bow hair clean. Use a specialized bow hair cleaner or rosin to keep the bow hair flexible and responsive.
Learn the basics of music:
Learn some music basics before learning the violin. Here are some music basics to know:
Notes and notation:
In music, notes are symbols that indicate pitch and duration. It is important to know the basic notes, such as quarter notes, eighth notes, and half notes, and their pitch lengths. It is important to learn some basic notation, such as beat sign, key sign, and repeat sign.
Scales and Intervals:
A scale is a series of notes arranged in a specific pattern that is often used to build the foundation of a piece of music. Understanding common types of scales, such as the natural major scale, natural minor scale, and melodic minor scale, can help you play a variety of pieces on the violin. An interval is the pitch distance between two notes.
Beats and Rhythm:
A beat is a unit of time in music that determines when a note is played. Understanding the different types of beats, such as quarter, third, and diatonic, and how they are combined can help you grasp the rhythm of the music.
Is it very hard to learn violin?
Reasonable expectations: Learning the violin takes time and patience. The first few months can be especially difficult for beginners. There are many skills that need to be mastered in order to play good-sounding music, including proper posture, bow-holding techniques, note placement, and bow-string control, to name a few. Consistent practice and instruction are required.
Consistent Practice: The difficulty of learning the violin also depends on the learner’s level of consistency and the amount of time spent practising. Daily practice and active participation in lessons can accelerate the learning process. Practice does not have to be long, but it does have to be consistent.
Professional Guidance: Having an experienced violin teacher can help ease the learning curve. A teacher can provide personalized instruction to help students overcome challenges and ensure they build the right foundation. Violin lessons can help students get systematic instruction.
Is 1 hour of violin practice enough?
Is 1 hour of violin practice enough? This is a ubiquitous question, especially for beginners.
Practice time varies from person to person:
The adequacy of violin practice time varies from individual to individual. Every student learns at a different pace, practices at a different rate, and has different goals. For some students, one hour of training per day may be sufficient, while for others, more time may be needed.
Suggested Practice Time:
Typically, violin teachers recommend that beginners practice between 30 minutes and 1 hour per day. This range of time helps the student to establish good practising habits and gradually improve his/her playing.
Quality practice:
The quality of practice is more important than the length of practice. Even if it’s only 30 minutes, you can make a lot of progress if you practice with focus and purpose. The key is to make sure that you are practising effectively and not just practising to meet a time goal.
Learning the violin is a lucky start
Learning the violin is fun and challenging. By choosing the right violin, buying the necessary accessories, finding a great teacher, and practising consistently, you will gradually master this instrument. Learning the violin takes time, so don’t rush to make progress; enjoy the learning process, and you will achieve something different.


